Hey there! As a Roller Welding Repair supplier, I've seen firsthand how crucial it is to understand the steps involved in roller welding repair. Whether you're dealing with Coal Pulverizer Tables or Repair Coal Mill Table Liners, getting the process right can save you a ton of time and money. So, let's dive into the steps of roller welding repair.
Step 1: Inspection
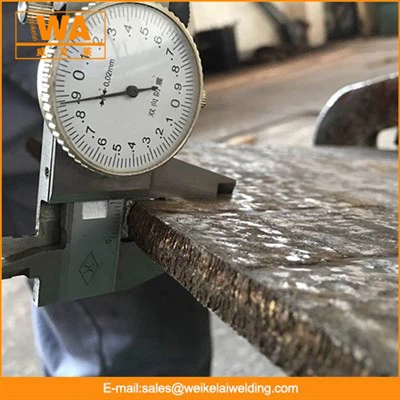
The first step in any roller welding repair job is a thorough inspection. You can't fix what you don't understand, right? We start by looking at the roller's surface for signs of wear, cracks, or any other damage. This involves using various tools like calipers to measure the roller's dimensions and a magnifying glass to spot small cracks.
For Coal Pulverizer Tables, this inspection is even more critical. These tables are under a lot of stress, and any damage can affect the efficiency of the coal - pulverizing process. By carefully examining the rollers, we can determine the extent of the damage and plan the repair accordingly. You can learn more about Coal Pulverizer Tables on our website Coal Pulverizer Tables.
Step 2: Cleaning
Once we've inspected the roller, the next step is cleaning. The surface of the roller needs to be free of dirt, grease, and any loose debris. We usually use a combination of solvents and wire brushes to clean the area. This is important because a clean surface ensures better adhesion during the welding process.
For Repair Coal Mill Table Liners, cleaning is also a key step. The liners are exposed to coal dust and other contaminants, which can interfere with the welding. By cleaning them properly, we can ensure a strong and durable repair. Check out our services for Repair Coal Mill Table Liners to see how we handle this process.
Step 3: Pre - heating
Pre - heating is a vital step in roller welding repair. Heating the roller before welding helps to reduce the risk of cracking and improves the quality of the weld. The pre - heating temperature depends on the type of material the roller is made of. For most common materials, we heat the roller to a specific temperature range, usually around 200 - 300 degrees Celsius.
This step requires careful monitoring. We use thermocouples to measure the temperature accurately and make sure it stays within the desired range. If the pre - heating is not done correctly, it can lead to serious problems during and after the welding process.
Step 4: Welding
Now, it's time for the actual welding. We use high - quality welding equipment and the right type of welding rod for the job. The welding process needs to be done carefully, following a specific pattern to ensure an even and strong weld.


We start by creating a root pass, which is the first layer of the weld. This pass provides the foundation for the rest of the weld. Then, we build up additional layers until we reach the desired thickness. During the welding process, we need to control the heat input to prevent over - heating or under - heating.
For Roller Welding Repair, we have a team of experienced welders who are trained to handle different types of rollers. They know how to adjust the welding parameters to get the best results. To learn more about our Roller Welding Repair services, visit Roller Welding Repair.
Step 5: Post - heating
After the welding is complete, we perform post - heating. This step helps to relieve the internal stresses in the weld and the surrounding material. Similar to pre - heating, we use thermocouples to monitor the temperature during post - heating.
We usually heat the welded area to a lower temperature than the pre - heating temperature and hold it there for a certain period of time. This allows the material to cool down slowly and evenly, reducing the risk of cracking.
Step 6: Machining
Once the post - heating is done, the roller needs to be machined to the correct dimensions. We use precision machining tools to ensure that the roller meets the required specifications. This includes turning, grinding, and other machining operations.
The machining process is crucial to ensure that the roller functions properly. It ensures that the surface is smooth and the dimensions are accurate, which is essential for the performance of the equipment.
Step 7: Testing
The final step in the roller welding repair process is testing. We perform various tests to ensure the quality of the repair. This includes non - destructive testing methods like ultrasonic testing and magnetic particle testing to check for internal defects.
We also perform hardness testing to make sure that the weld has the right hardness properties. These tests give us confidence that the repaired roller will perform well in its intended application.
Why Choose Us?
As a Roller Welding Repair supplier, we have the expertise and experience to handle all types of roller repair jobs. Our team of professionals is dedicated to providing high - quality services. We use the latest equipment and techniques to ensure that every repair is done to the highest standards.
If you're in need of roller welding repair services, whether it's for Coal Pulverizer Tables or Repair Coal Mill Table Liners, don't hesitate to get in touch with us. We're here to help you keep your equipment running smoothly and efficiently. Contact us today to discuss your needs and get a quote for our services.
References
- Welding Handbook, American Welding Society
- Machinery's Handbook, Industrial Press Inc.