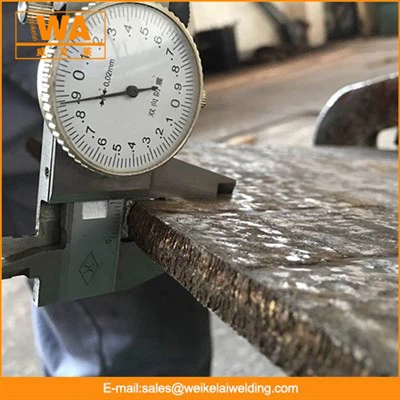
Setting up a solid wire welding machine is a crucial process that requires careful attention to detail and a good understanding of the equipment. As a solid wire welding supplier, I have extensive experience in guiding customers through this setup. In this blog, I will provide a comprehensive guide on how to set up a solid wire welding machine, ensuring a smooth and efficient welding process.


Step 1: Preparation
Before you start setting up the solid wire welding machine, it is essential to gather all the necessary tools and materials. Here is a list of items you will need:
- A solid wire welding machine
- Solid welding wire of the appropriate diameter and type for your project
- Welding helmet
- Welding gloves
- Safety glasses
- Welding apron
- Wire brush
- Chipping hammer
- Clamps
- Ground cable
Make sure you are working in a well - ventilated area, as welding produces fumes that can be harmful if inhaled. Also, ensure that the power source is compatible with the welding machine's requirements.
Step 2: Inspect the Welding Machine
Thoroughly inspect the solid wire welding machine for any visible damage or signs of wear. Check the power cord for fraying or cuts, and ensure that all the connections are tight. Examine the wire feeder mechanism to make sure it is clean and free of debris. If you notice any issues, it is advisable to contact a professional for repair before proceeding.
Step 3: Install the Welding Wire
- Open the Wire Spool Compartment: Locate the wire spool compartment on the welding machine. This is usually a door or a cover that can be easily opened.
- Select the Right Wire: Choose the solid welding wire that is suitable for your project. Consider factors such as the type of metal you are welding, the thickness of the material, and the welding process you will be using. You can find a variety of welding wires on our website, including Flux Core Stainless Steel Welding Wire, Flux Core Welding Wire, and Metal Cored Welding Wire.
- Install the Wire Spool: Place the wire spool onto the spindle in the wire spool compartment. Make sure the wire unwinds in the correct direction, usually counter - clockwise. Secure the spool in place using the locking mechanism provided.
- Thread the Wire: Pull the end of the wire through the wire guide and into the wire feeder. Follow the path indicated by the manufacturer's instructions. Some welding machines have a built - in wire threading tool that can make this process easier. Feed the wire through the drive rolls, making sure it is properly seated. Continue threading the wire through the liner and out of the welding gun.
Step 4: Set the Welding Parameters
The welding parameters, such as voltage, wire feed speed, and amperage, need to be set correctly for optimal welding results. These settings depend on several factors, including the type and thickness of the metal, the welding wire diameter, and the welding position.
- Refer to the Manufacturer's Chart: Most welding machines come with a chart that provides recommended settings for different welding applications. Consult this chart to determine the appropriate voltage and wire feed speed for your project.
- Start with Conservative Settings: If you are unsure about the exact settings, it is better to start with conservative values and make adjustments as needed. You can then test the weld on a scrap piece of metal to evaluate the quality and make any necessary changes.
- Adjust the Settings: Use the controls on the welding machine to set the voltage and wire feed speed. Some machines have digital displays that make it easy to read and adjust the settings accurately.
Step 5: Connect the Ground Cable
The ground cable is an essential part of the welding circuit. It provides a path for the electrical current to flow back to the welding machine.
- Clean the Ground Surface: Select a clean and flat surface on the workpiece or the welding table. Use a wire brush to remove any rust, paint, or dirt from the surface to ensure a good electrical connection.
- Attach the Ground Clamp: Connect one end of the ground cable to the ground terminal on the welding machine. Then, attach the ground clamp to the cleaned surface. Make sure the clamp is firmly attached to prevent any arcing or overheating.
Step 6: Test the Welding Machine
Before starting your actual welding project, it is important to test the welding machine to ensure that everything is working properly.
- Turn on the Welding Machine: Plug in the welding machine and turn it on. Check the power indicator to make sure it is functioning correctly.
- Test the Wire Feed: Press the trigger on the welding gun to start the wire feed. Observe the wire as it comes out of the gun. It should feed smoothly without any jams or interruptions.
- Check the Arc: Hold the welding gun about 1/8 to 1/4 inch away from the workpiece and press the trigger to start the arc. The arc should be stable and consistent. If the arc is unstable or there are any issues, adjust the welding parameters or check the equipment for problems.
Step 7: Welding Safety
Safety should always be your top priority when using a solid wire welding machine. Here are some important safety tips to keep in mind:
- Wear Protective Gear: Always wear a welding helmet, gloves, safety glasses, and an apron to protect yourself from sparks, heat, and UV radiation.
- Ventilation: Ensure proper ventilation in the welding area to remove fumes and gases. If necessary, use a local exhaust ventilation system.
- Fire Prevention: Keep a fire extinguisher nearby and remove any flammable materials from the welding area.
- Electrical Safety: Avoid touching the welding electrode or the workpiece with bare hands while the welding machine is on. Do not use the welding machine in wet or damp conditions.
Step 8: Troubleshooting
Even with proper setup, you may encounter some issues during the welding process. Here are some common problems and their solutions:
- Wire Jams: If the wire gets jammed in the wire feeder or the liner, stop the welding process immediately. Unplug the welding machine and carefully remove the jammed wire. Check for any debris or kinks in the wire path and clean or replace any damaged components.
- Poor Weld Quality: If the welds are porous, have excessive spatter, or are not bonding properly, it may be due to incorrect welding parameters. Adjust the voltage, wire feed speed, or amperage as needed. Also, make sure the workpiece is clean and properly prepared.
- Arc Instability: An unstable arc can be caused by a variety of factors, such as a dirty welding gun tip, incorrect wire feed, or improper grounding. Clean the welding gun tip, check the wire feed mechanism, and ensure a good ground connection.
Conclusion
Setting up a solid wire welding machine correctly is essential for achieving high - quality welds and ensuring a safe working environment. By following the steps outlined in this guide, you can set up your welding machine with confidence and start your welding projects with ease. If you have any questions or need further assistance, our team of experts is always ready to help. We are a leading solid wire welding supplier, offering a wide range of welding products and solutions. Contact us today to discuss your welding needs and explore our product offerings for your next project.
References
- Welding Machine Manufacturer's Manuals
- American Welding Society (AWS) Standards