Hey there! I'm [Your Name], and I work as a wear plate supplier. Today, I'm gonna walk you through the process of replacing a worn - out wear plate. Whether you're in the mining, construction, or manufacturing industry, wear plates are crucial for protecting your equipment from abrasion, impact, and corrosion. So, let's get started!
Step 1: Assess the Damage
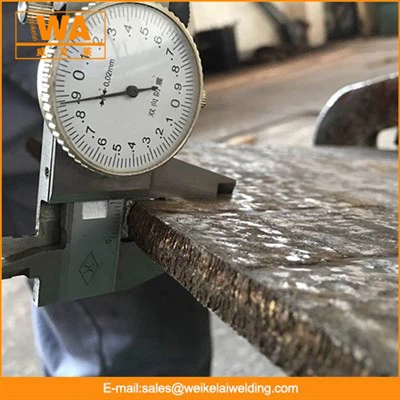
The first thing you gotta do is take a good look at the wear plate. Check for signs of excessive wear, such as thinning, cracks, or holes. Measure the thickness of the plate at different points using a caliper. If the plate has worn down beyond the manufacturer's recommended minimum thickness, it's definitely time for a replacement. Also, look for any signs of deformation or warping, as these can affect the plate's performance.
Step 2: Choose the Right Replacement Plate
As a wear plate supplier, I know there are a variety of wear plates available in the market. The choice depends on your specific application.
If you need a plate that can withstand high - temperature and severe abrasion, you might want to consider a Chromium Carbide Plate. Chromium carbide plates are known for their excellent hardness and wear resistance, making them ideal for applications in the cement, power generation, and mining industries.
For applications that require extreme hardness and impact resistance, Tungsten Carbide Plate could be the way to go. Tungsten carbide is one of the hardest materials available, and these plates can handle heavy - duty wear and tear.
Another option is the Hardfacing Processed Plate. This type of plate has a hardfacing layer applied to its surface, which enhances its wear resistance. It's a cost - effective solution for many industrial applications.
Step 3: Gather the Necessary Tools
Before you start the replacement process, make sure you have all the tools you need. You'll typically need a wrench or socket set to remove the bolts holding the old wear plate in place. A grinder might be necessary to cut through any welds if the plate is welded on. You'll also need a hoist or lifting equipment to remove the old plate and install the new one, especially if it's a large and heavy plate. Safety gear like gloves, goggles, and a hard hat are a must - have to protect yourself during the process.
Step 4: Remove the Old Wear Plate
If the wear plate is bolted on, use your wrench or socket set to loosen and remove the bolts. Keep the bolts in a safe place as you'll need them to install the new plate. If the plate is welded, use a grinder to carefully cut through the welds. Make sure to wear your safety gear during this process, as sparks can fly everywhere.


Once the bolts are removed or the welds are cut, use a hoist or lifting equipment to lift the old wear plate off the equipment. Be careful not to damage any surrounding components while removing the plate.
Step 5: Prepare the Surface
After removing the old wear plate, you need to prepare the surface where the new plate will be installed. Clean the surface thoroughly to remove any dirt, debris, or old paint. Use a wire brush or a grinder to smooth out any rough spots or uneven surfaces. If there are any holes or damages on the surface, repair them before installing the new plate. This will ensure a proper fit and good adhesion of the new wear plate.
Step 6: Install the New Wear Plate
Carefully position the new wear plate on the prepared surface. Make sure it aligns properly with the holes or mounting points. If the plate is bolted on, insert the bolts and tighten them using the wrench or socket set. Tighten the bolts evenly to ensure a secure fit. If the plate is welded, use a welding machine to weld the plate in place. Follow the proper welding procedures and safety guidelines to ensure a strong and reliable weld.
Step 7: Test the Installation
Once the new wear plate is installed, it's important to test it to make sure it's working properly. Start the equipment and run it for a short period. Check for any signs of vibration, noise, or misalignment. Inspect the plate for any signs of movement or damage. If everything looks good, you're all set!
Conclusion
Replacing a worn - out wear plate might seem like a daunting task, but if you follow these steps, you can do it safely and effectively. As a wear plate supplier, I'm here to help you choose the right plate for your application and provide you with any support you need during the replacement process.
If you're in the market for high - quality wear plates, don't hesitate to reach out to me. I can offer you a wide range of wear plates at competitive prices. Whether you need a small plate for a simple application or a large, custom - made plate for a complex project, I've got you covered. Let's work together to keep your equipment running smoothly and efficiently.
References
- Industrial Wear Plate Handbook
- Wear Resistance Materials and Their Applications